
It still needs to be hemmed, not to mention a good iron!
I started it 2 weekends ago, but haven't had much time to devote to it due to a crazy work schedule and some very late nights.
It's a bit of a hodge-podge as far as the design and construction goes.
I followed the instructions (up to a point) for an 18th century petticoat found on the Fashionable Frolick blog. However I changed the pleating pattern for a more 16th century look.
As to sewing techniques, I decided to try a 16th century seam as demonstrated by Laura Mellin on her Extreme Costuming site.
My images are going to be pretty similar to hers since I'm also using red fabric, but I'll document my process anyway.
I started with two pieces of heavy linen measuring 60" across and 48" down. This meant that I would have a final circumference of about 120" (or a little less due to seam allowances). Since this method involved finishing each piece first and then sewing them together I turned the side seams down twice (encasing the raw edges) for a final seam allowance of 1/2".
I actually didn't need to fold it under twice since I was using the full length of the fabric and therefore didn't actually have a raw edge, but I thought it would be good practice for when I moved on to the shift.
 Anyway, I then used a running stitch to sew the seam down (using a 2ply waxed linen tread). As you can see I used a larger stitch on the inside, but an extremely small one on the outside. I repeated this process for all 4 side seams (two for each side). By the time I reached last seam I had gotten much better at getting the outside stitch to "hide" within the weave of the linen so as to be almost invisible.
Then I whip stitched the two panels together along the side seams, ending 10" from the waist on either side and then re-enforced the last couple of stitches.
This resulted in an extremely strong and extremely flat seam! However, this method is very labour intensive since you're effectively sewing each seam 3 times.

Whip stitching the two panels together

Finished seam (inside)

Finished seam (outside) showing my first attempt (right side) and far more successful final attempt (left side)
 I then knife pleated the front and back panels separately (with pleats moving towards the front) and then did a loose whip stitch over the top of the pleat to hold them in place. These stitches are a little messy but that doesn't matter since they'll eventually be encased in the waist band.
I then encountered a bit of a dilemma. The tutorial I was following was for an 18th century petticoat and so recommended the use of linen tapes to finish the waist, but that wouldn't be appropriate for the 16th century. A self-fabric waist band would have been better, but since the linen I was using was extremely heavy that would have resulted in a lot more bulk at the waist. So I reasoned that since I was already using an anachronistic construction method I may was well use the tapes...it's not like anyone but me was going to see it.
 So I cut two long pieces (about 64" each) of 1" linen tape, folded it in half and then encased the pleats on the front panel, leaving two long ties on either side.
I back stitched the tape down, sewing though all layers of fabric. I then did the same thing to the back panel.
(I had forgotten how much I disliked back stitching...It's so hard to make it look neat and tidy! The Elizabethan seam is starting to look a lot more appealing!)

Front and back panels showing inside seam and side pocket.

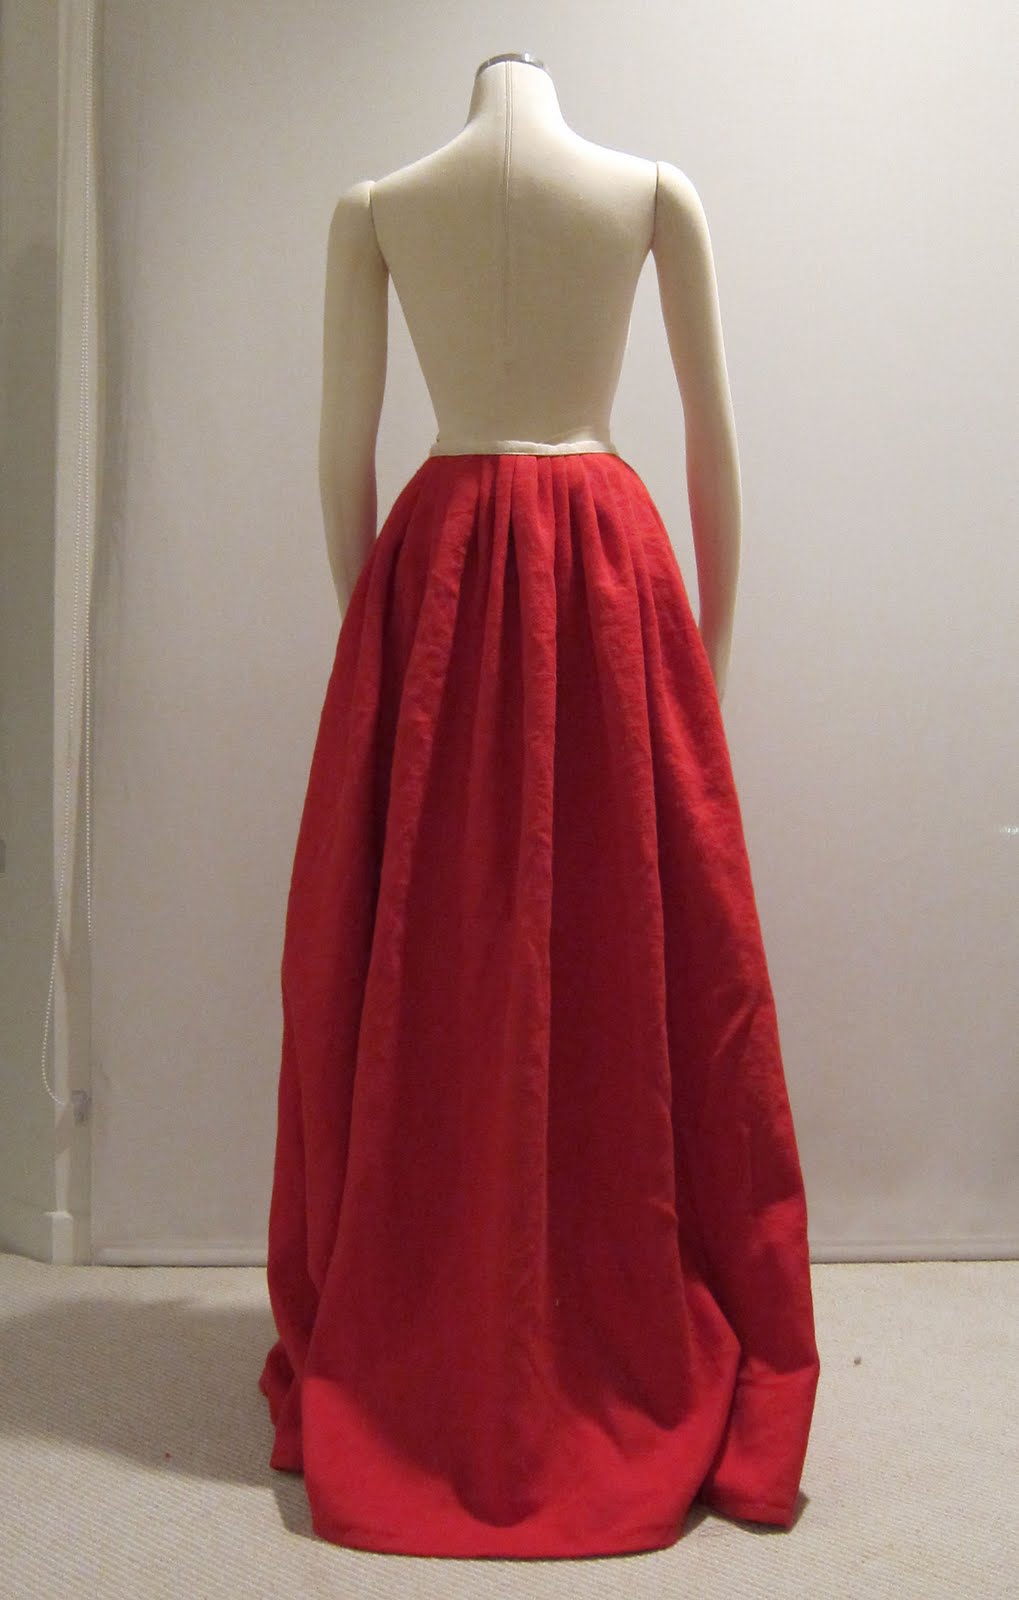
Finished front and back panels showing relative size.
I now had a more or less finished petticoat!
As you can see from the image above, the front piece is much larger than the back. This was done on purpose and is another point at which I diverged from the tutorial (which had both pieces the same). I used larger and more widely spaced knife pleats on the front and very narrow ones on the back...ending in some sort of quasi-box/rolled pleat that I improvised to get the two sections to meet properly.
Basically, I wanted to move the most of the fabric of the petticoat towards the back, both to cut down on bulkiness over the stomach (because who wants that?!) and to achieve a more 16th century silhouette. Also, since there will be some overlap where the two pieces meet, a wider front panel will move that additional bulk towards the back.

The base: a corded petticoat
(cat is optional)

Tie the front panel at the back

Then tie off the back panel and tuck in
(either at the front or wrap around to the back)


Tie the front panel at the back
Then tie off the back panel and tuck in
(either at the front or wrap around to the back)

Side detail showing overlap
One of the reasons I opted for this construction method is that I really wanted a petticoat with an adjustable waist but didn't want to just put it on a drawstring (especially with a fabric this heavy).
This not only allows for any weight fluctuations, but more importantly for my purposes, it lets me easily adjust how far up my hips/waist it sits. This is especially useful when wearing multiple petticoats, since you don't want them all siting at the same place and bulking up your waistline. I tend to wear my inner most petticoat lower on the hips, moving up to the waist with each progressive layer. So depending on where this petticoat ends up sitting in the pecking order I can always adjust the waist measurement accordingly.
Plus it allows for easy access to a pocket worn underneath! (Handy for hiding cell phones, IDs and other modern necessities)

Pocket!

And finally, Tuque oversees the process...
***
No comments:
Post a Comment